HowTo: Enlarge a Virtual Drive on VMware vSphere
In the past we had to upgrade our VMware vSphere virtualization server and its virtualization hosts machine VMware ESXi. An old virtual debian machine has had multiple dist-upgrade iterations in its life and it even survived the VMware upgrades from V4 to V5.5. Back then it was running an important OwnCloud instance and the virtual disk on this machine was eventually running out of free space. That’s when I was confronted with the virtual disk space enlargement.
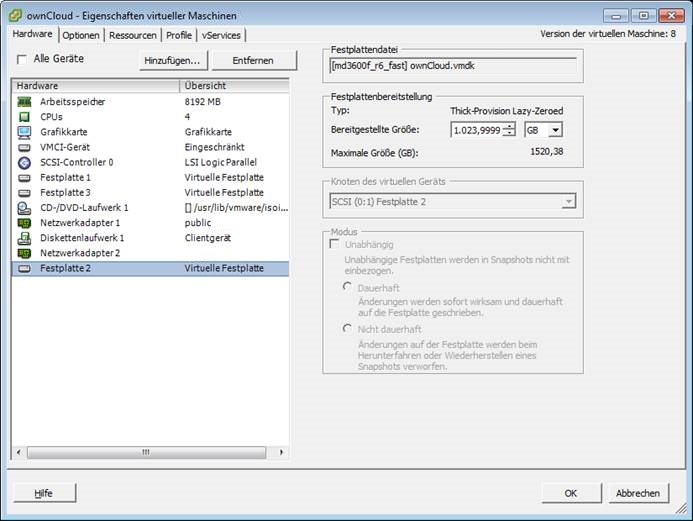
So no problem, you’d think, just open the properties of the machine instance, chose its virtual disk, change the size by entering a new number.
You might need to let the operating system refresh it’s filesystem partition table - first check the filesystem, then resize the mounted volume. Assuming you want to work with /dev/sdb:
e2fsck -f /dev/sdb1
resize2fs /dev/sdb1
You should be good to go from now on.
If this is not working for you…
If you are out of luck, the virtual machine or virtual drive does not support enlarging or shrinking. The field is grayed out in this case. That’s when you need to create a new virtual drive of custom (bigger) size, copy the data, remount and register it in the file system table. Assuming your small partition is /dev/sdb1 and your large partition on a new drive is /dev/sdc1.
Usefull commands:
| Command | Action |
|---|---|
fdisk -l | Show drive / partitions list |
df –h | Show mounted partitions |
blkid | Show drive UUID list |
How to migrate a partition:
- Use
df -hto list mounted locations. Take note of the location for/dev/sdb1. I will assume it is/mnt/sdb1. Keep in mind, your setup will likely differ. - If you have not yet created a partition
/dev/sdc1on your new virtual drive, do so by usingfdisk /dev/sdc. - Stop running services which depend on files of the partition mount, or send them to a maintenance mode if there is one. Make sure, there wont be any file access.
- (To make sure, there will be nothing interacting with the old drive, just unmount it)
umount /dev/sdb1
- Copy all data from small sdb1 to big sdc1. You do not want to mix up the identifiers, so check everything twice.
- the blocksize (
bs) is adjustable - this shell starts the copying process from partition
sdb1to partitionsdc1as a background process. Its process identifier is saved as$ddpid, to which every 5 seconds a SIGUSR1 signal is being sent. That signal tells a process to softly terminate by default. While it is copyingddwill ignore the signal. This loops works until the process identified by$ddpidis finally terminated. - Note: sometimes
ddwill not shutdown after completion, just waiting for such a stop signal.
- the blocksize (
dd if=/dev/sdb1 of=/dev/sdc1 bs=10M &
ddpid=$!
while [ $(ps -ao pid | grep $ddpid) ]; do kill -SIGUSR1 $ddpid; sleep 5; done
- Fix UUID of
sdc1by create a new random one:
tune2fs /dev/sdc1 -U random
- Check the file system of
sdc1
e2fsck -f /dev/sdc1
- Expand
sdc1file system to the correct size.
resize2fs /dev/sdc1
- Mount the new partition to
/mnt/sdc1/(or your old mount location) and list the drive overview.
mkdir /mnt/sdc1
mount /dev/sdc1 /mnt/sdc1
df -h
- If everything looks good, start the the services you stopped or sent to maintenance mode earlier.
- Fix fstab to add the missing partition, in order for it to startup during boot routine, use the UUID previously generated. Don’t forget to remove / disable the entry for the old partition
/dev/sdb1.
vi /etc/fstab
- (If you want to test and reboot)
reboot